Saturday, July 6, 2013

Always on my mind; forever in my heart.

It is with great sorrow and sadness that I tell you of my husband's passing.

You have joined me in prayers of fortitude throughout his illness...deep thanks my friends!

My brave warrior, my friend and beloved husband lost his 10 month long battle against cancer on Saturday 29 June 2013. He was only 49 years old. He fought valiantly and I am so proud of him!
 
God gave us almost 13 wonderful years together!!!

He was a sensitive soul, a gentle giant, a loving husband, father, big Daddy to our granddaughter Ghanaan, and friend to many!

There is so much I want to say, but our tender last moments will be my poignant memories to cherish for always. Some things are just too sacred to share!


This is one of the many ways I will remember you by...always with an arm outstretched to greet or help your fellow man!


Raafiq, I will always remember your smile, your touch, your love, your adoration!
Till we meet again my darling...rest in peace!
We miss you so much every day!
 
"Verily, we are Almighty God's and verily to Him shall we return."(Qur'an 2:156) 


Saturday, June 15, 2013

French Script mirror and dresser re-style!

 
Thanks for spending some time with me!
 
I've had this mirror for-ever and always wanted to give it a fresher look. I decided it was time to give it a make over!
 
Here it is painted with Cece Caldwell vintage white!
 
This is what it used to look like!
 
 
The painted mirror sent me on a nostalgic trip down memory lane. This was one of the first home decor items hubby and I bought together...did we enjoy junking together!
 
Sweet memories inspired me to re-style my dressing table. This dressing table has come a long way too!
 
 
I bought nothing new for the re-style...all these items were grabbed from elsewhere in the house!
 
I moved my wrought iron mannequin out of the corner and placed it next to the dressing table!
I was suddenly overcome with emotion thinking of my wonderful wedding day. How handsome my hubby looked and now so stricken with cancer. Please God ease his pain!
 
The memories made me reach for the box holding my wedding ensemble and I was suprised that everything still looks so fresh. The veil is as creamy white as the day I wore it, the dress is so classic and timeless!
 
 
Pretty vintage tiara!
 
Beautiful guipure lace bodice!
 
Awesome beadwork!
 
I love the toungue-in-cheek quote on the tag of the satin covered dress hanger!
 
I'm getting quite carried away...
 
Some detail on the mirror. I decoupaged parts of the mirror frame with tissue copies of script. You can purchase beautiful digital downloads from Villabarnes on Etsy. It is the same ephemera that Rosemary uses in her own stunning works of art! 


My pretty ironstone pitcher!
 
 
Chippy wire lamp frame and old books!
 
 
My hand-made nest and hand painted eggs!
 
 
Hope you enjoyed my trip down memory lane!
 
And now for an exciting GIVEAWAY:


The lovely Koralee from BlueBirds Notes is hosting a GIVEAWAY for a $20- gift certificate to Daisy Pink Cupcake's new Etsy Shop : Daisy Pink Wish Hair Bows & Jewelry

So head over to BlueBirds Notes and let's get celebrating with a $20 gift certificate to anything in Daisy's sweetest new Etsy shop. You will fall head over heels in love with the pretty accessories for your Princess......making her world feel fairylike with lace, jewels, ribbons and Bows! 
 
You can often find me at these fabulous parties:


Redoux Friday Link Party
Shabbylicious Friday Link Party
Funky Junk Interiors - Friday Junk Party
Life on Lakeshore Drive - Boquet of Talent Sunday Link Party


Sunday, June 9, 2013

Re-designing a picture frame and metal vase

I decoupaged this tray with tissue copies of script and a French Label.
 
 
I aged the parts of the frame that I did'nt decoupage. I dry-brushed the script on the inside of the frame with watered down gesso.
 
I inserted a French perfume label.
 
 
Now I am on the hunt for some cute handles to finish it off!
 
 
I love the patina of the inside of this metal vase, just the right amount of variation in color and rust!
 
 
Just a pity that this fabulous patina did'nt favour the outside of this vase.
 
I decoupaged this vase with French script and an image of a lady playing the violin. I bathed the lace in an acrylic wash and used it as a frame for the image. I also painted the base and the edge of the vase with a mix of acrylic paints and did some distressing!


Image on vase: Viola of Shabby chic inspired. Created with images from The Graphics Fairy and her own. You should head over to Viola's blog. You will be inspired!
 
French letter Script on vase and tray: Vintage country style
 
French perfume label: The Graphics Fairy
 
You can often find me at these fabulous parties:


Sunday, June 2, 2013

DIY Suitcase table

 
Greetings from a freezing and wet Cape Town. We are in the grip of Winter...Brrr!
 
Look at my balcony covered in hail!


A big flurry of hail was blown into my bedroom because I had the sliding door slightly open when the hailstorm hit us!
 
Quite a mopping up operation, but anyhoo, back to this week's post. If you regularly visit my blog, you will know that I like the idea of repurposing. I poked around in my garage the other day looking for a small project to finish for my weekly blog post. I found some cool mid-century legs and wondered what I could do with it. I spotted this banged up suitcase and got the idea to create a DIY suitcase table!
 
Now, the clips on the case no longer function and the top slopes inward ever so slightly. The lid is wonky and you have to apply pressure to close it and then of course it gets stuck...ugh! I should probably have saved the legs until I could get a suitcase that's in better shape, but create I have to...come hell or high water...lol
 
Here is the before in all its mottled yellow-tan splendour. You can see clearly how the lid when closed, overlaps too far.
 
 
I primed it with some gesso, painted the trims in apple green and spray painted the hardware in pistachio green. Then I began toying with the idea of covering the suitcase with fun 1950's children's story book pages...turning it into a fun piece for a kid's room.
 
I started by cutting out the pictures and laying them out over the top. Then I modge podged the pictures onto the suitcase. I just kept going until the entire suitcase was covered with pictures from these story books.
 
 
 I hot-glued black trim all around the edge of the suitcase!
I placed the legs where I wanted them, marked it off and then used pratley glue to attach the legs to the bottom of the suitcase.
Then came the test and Ha...the legs are lined up great...all touching the ground perfectly!


I love the way this piece turned out and it will be my grand baby, Miss G's nightstand!
 
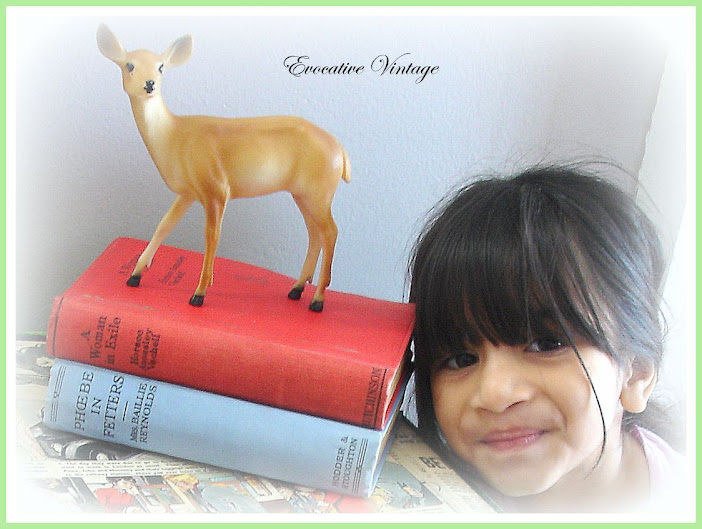
Here she is silly expression and all, poking her little face into one of my pics...sweet child of my heart!


And now for some exciting news.....Whoop, whoop, Hurrah! Annie Sloan Chalk Paint is coming to South Africa in July. How Fantabulous is that?!


You can often find me at these fabulous parties:


Redoux Friday Link Party
Funky Junk Interiors - Friday Junk Party
Life on Lakeshore Drive - Boquet of Talent Sunday Link Party


Saturday, May 25, 2013

Looove Dressforms and Mannequins


What is it with me and dressforms? I just can't pass one up! Remember My paper decoupaged mannequin? 
 
A few weeks ago, I bid on this bust online, but lost out to another buyer. The seller was sweet enough to offer me an identical one for the same price as my final bid. Maybe she could sense my mannequin fetish!:)
 
I went to 'shop' my junk pile for a stand and base. I found a wooden hat stand, but didn't like the square shaped pole. Then I picked an old, metal plant stand with scrolly base...whoop, whoop. Thank heavens for buying 'junk' even though THEN you had no idea why you bought it! 
I asked my neighbour to cut the pole to size. He then also inserted the pole into the cavity underneath the bust and used body filler to fix the bust to the pole. Body filler is used to repair dents in your car. My neighbour is an auto body repairman....lucky me!
 
I refreshed the stand with spray primer and a coat of cream spray paint!
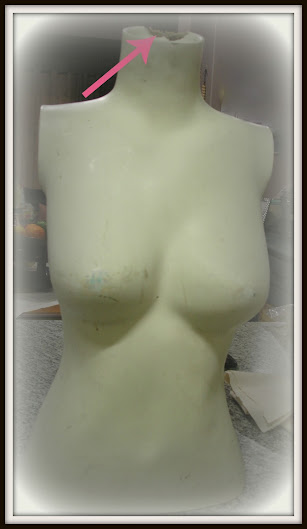
Now...what to do with the big gash at the top of her neck?
BINGO!!! A BALL jar lid of course! I spray painted it the same color as the stand, drilled a hole in the middle and screwed the dowel of a finial into the hole. I spray painted the finial as well. I set the lid and the finial aside to glue on later, then I started to decoupage the mannequin.
 
I used calico fabric and ripped it into pieces...Oh, how therapeutic to rip through fabric!!!!
I tea stained each fabric scrap and hung it out to dry...lots of them!
This is the back of the mannequin to see the effect of the fabric scraps!
I used this stuff to fix the fabric to the body:
Cold Glue
Its a wood glue, but it works brilliantly and you save on podge. After the body was covered with the fabric, I applied several layers of podge. I sanded with 1000 water paper inbetween layers to get a smooth finish.
Then I just played with lace and other fabric scraps. Did you notice my French image? The image is from The Graphics Fairy and printed on fabric.
 
I also printed the year 1902 on fabric and attached it, and a scrap of hand stamped ribbon..I love the message!
I love this flower and diamond shaped lace!


I dyed the silk flower with acrylic paint mixed with water!
 
 
The backdrop of the pics is as a result of my half-finished kitchen extension. We removed an awkward window to make place for the roof of the extension which is on the other side of this wall.
Yawn!!! Its past 12 0' clock!
Follow your Heart
Inspiration will Find you
Find your Heart
Be Yourself
 
You can often find me at these fabulous parties:


Redoux Friday Link Party
Funky Junk Interiors - Friday Junk Party
Life on Lakeshore Drive - Boquet of Talent Sunday Link Party
Homespun Happenings - Rustic Restoration Weekend link Party


01 09 10 11 12
Blogging tips